ENER4GREEN Solar Panel manufacturing process
The following information is intended to give our customers an overview of how Ener4Green Solar Panels are made. We believe that if our customers understand how the manufacturing process works, then they will appreciate the price they pay per watt for each panel. This is just a brief overview of our process and is in no way indicative of the complete process. Care should be taken if you decide to follow our steps in trying to make your own panels from our process, as all the steps are not indicated. You might have seen sites claiming that you can build your own panels for less that two hundred dollars, while it might be true, the information given is for people doing it as a hobby and not for consumer use. Solar panels for commercial use should always be made under ISO conditions, where the environment is controlled, process documented, workers are qualified and properly trained, and all machines are calibrated and validated according to standard.
Process Step 1
Solar cells are sourced form our contract manufacturer producing the highest quality raw materials. These premium cells are the most important part to consider when manufacturing Ener4green high quality panels. The type of cells used will depend on the type of panel we intend to manufacture, their functionality and ultimately their life span.
Process Step 2

Cells are inspected for cracks and other defects and their power outputs tested. The power output of each cell will determine how many we used in the production of our panels. The Power should increase with each new cell connected. It is important to use cells of similar power output characteristic for higher quality.
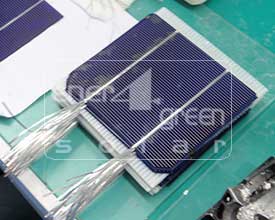
Process Step 3
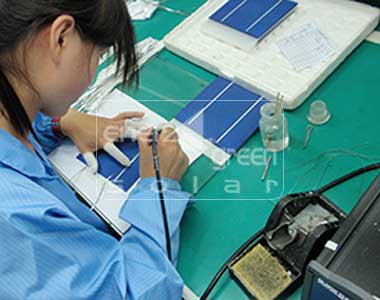
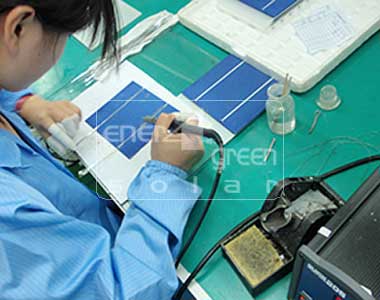
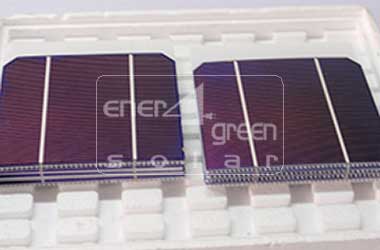
Each cell is very fragile; therefore care is taken when handling. The above picture shows the front of the cells. The first thing we do is to solder two pieces of tin coated tabbing wire to the front of each cell. This looks like a shiny silver flat wire. When the solder iron heats the wire the solder will melt and bond with the cell.
Process Step 4
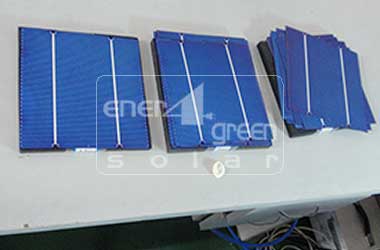
Shown are cells with tabbing wire soldered on the front of each cell first and stacked on each other. These cells are known as tabbed cells. The length of the tabbing wire should be twice the length of each cell for reason that will be evident later in the process.
Process Step 5
This image shows the back of tabbed cells, the overhanging wire is soldered to the back of the following cell to form a row as shown above. Special machine is used to control the welding process of tabbing wire to ensure excess heat is not transferred to the cells.
Process Step 6
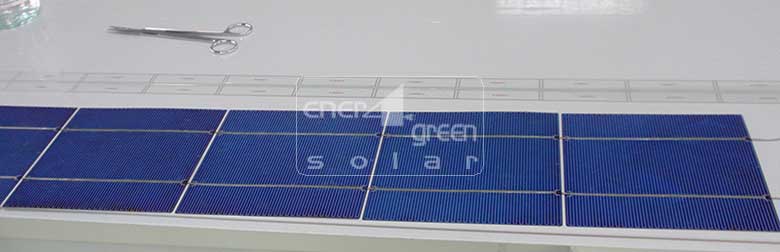
These are cells welded and connected together in a single row. They are connected to other cells to make a complete panel. Care is taken to ensure uniform spacing of Cells and that each cell is level and is of similar voltage and power.
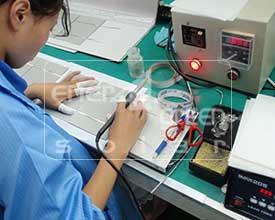
Process Step 7
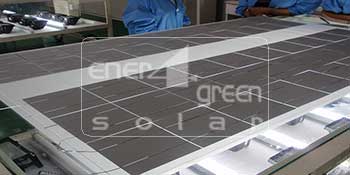
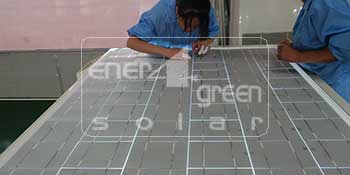
This image depicts the back of Ener4green panel during manufacturing process. Rows are welded together in series using a thicker tabbing wire known as the bus line. Workers are ensuring that the intervals between cells, and cell-levels are the same. They are also checking for defects and making sure that the solder welding is done to specifications. The exact positions to place the junction box is measured and determined at this point. Because cells get easily broken, workers verify that all cells are intact. Any broken or cracked cell are replaced. Measurements are also verified at this step in the process.
Process Step 8
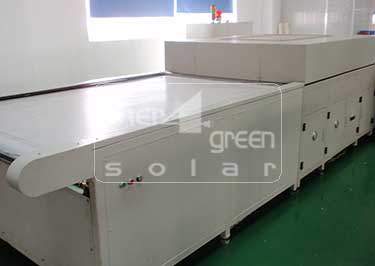
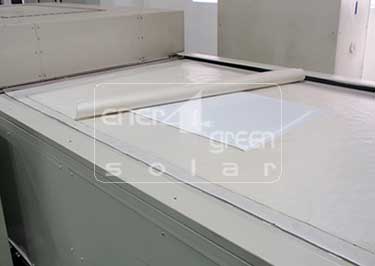
Laminator Machines: This machine laminates the panels; glass covered cells along with TPT and layers of Ethylene-Vinyl Acetate (EVA) are placed in the machine and come out perfectly laminated. Laminated panels will extend the life span of the panel as it prevents dust and moisture from entering inside the panel which would block sunlight and cause corrosion.
Process Step 9
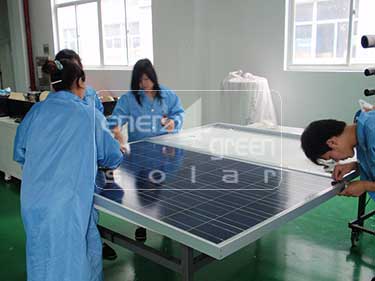
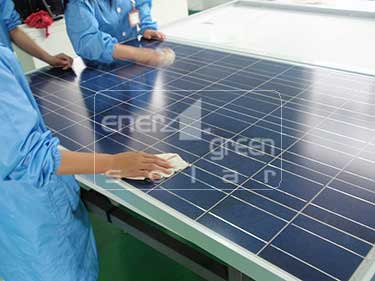
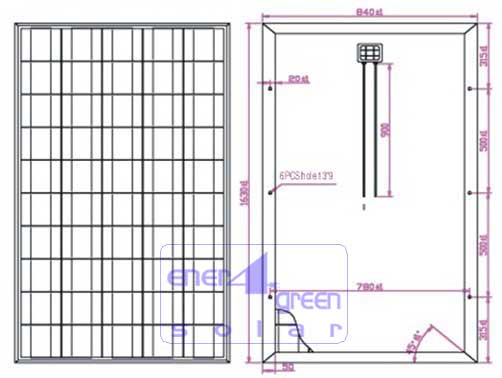
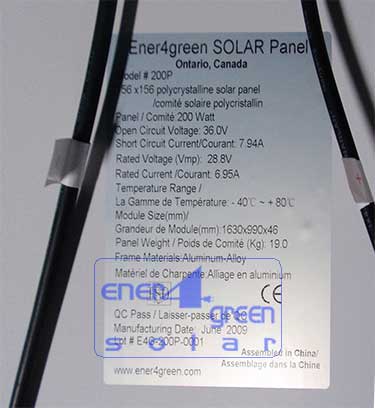
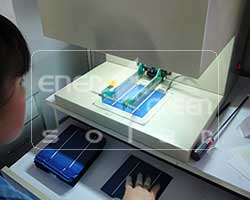
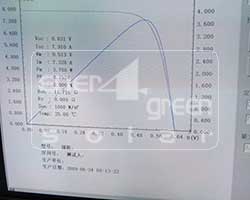
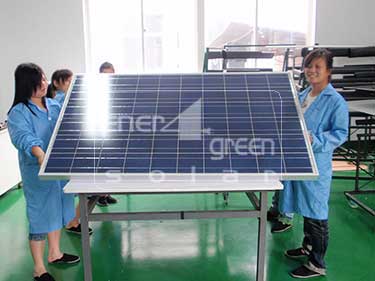
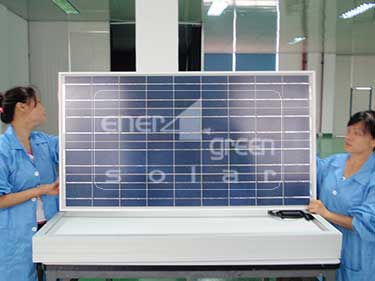
This is a finished Ener4green solar panel with Aluminum Alloy frame. Panels are then subject to rigorous Quality control testing to determine Maximum power output, voltage and current. The panels are then cleaned and inspected for any physical defects such as dents, scratches or cracks.
Process Step 10
Finishes and inspected products are then identified with ener4green labels in English and French, with all necessary technical information, the manufacturing date, lot number and quality markings.